Easy 1:48 Scale Artwork with the NYPL
 This January, the New York Public Library (NYPL) released a ton of images and artwork into the public domain, perfect for those mini modern scenes, especially retro loving hipsters.
Today's post walks you through easy steps to using these public domain images for quick and visually engaging artwork and rugs for your micro mini scenes.
You'll learn how to make gorgeous, photogenic rugs from inkjet fabric and how to frame your own artwork with ease.
NYPL Art as Rugs
Find your favorite abstract artwork from the NYPL archives and copy it to a Word document, then size it for a suitable 1:48 rug (around two to three inches on one side is great).

Grab a sheet of inkjet printable fabric from your local craft shop and print the Word document exactly as you would a regular piece of paper (no special settings required--in fact, the ink will mess up if you don't use the regular settings).

After 10 minutes, iron the inkjet paper to set the ink. For rugs, I don't remove the paper backing before ironing because the rugs look more realistic with the extra thickness and the glue holding the paper to the fabric will melt when you iron it, helping to seal the fibers and prevent fraying. Cut your rug free and you are done. Instant mid-century inspired rugs!
NYPL Images As Framed Prints

Even though 1:48 is a tiny scale, making artwork for them is actually very beginner friendly, especially if you go for the over-sized print look that has been so trendy these past couple years. Oversized prints at this scale aren't any smaller than your average 1:12 scale artwork.

Once you've found your favorite artwork, size them to your taste and print on cardstock (remember, in 1:48 scale, a quarter of an inch is equivalent to one foot, so a print 1 inch long is 4 feet at this scale!). I usually like to size mine about 1 inch or smaller with a boarder of space about 1/8 of an inch.
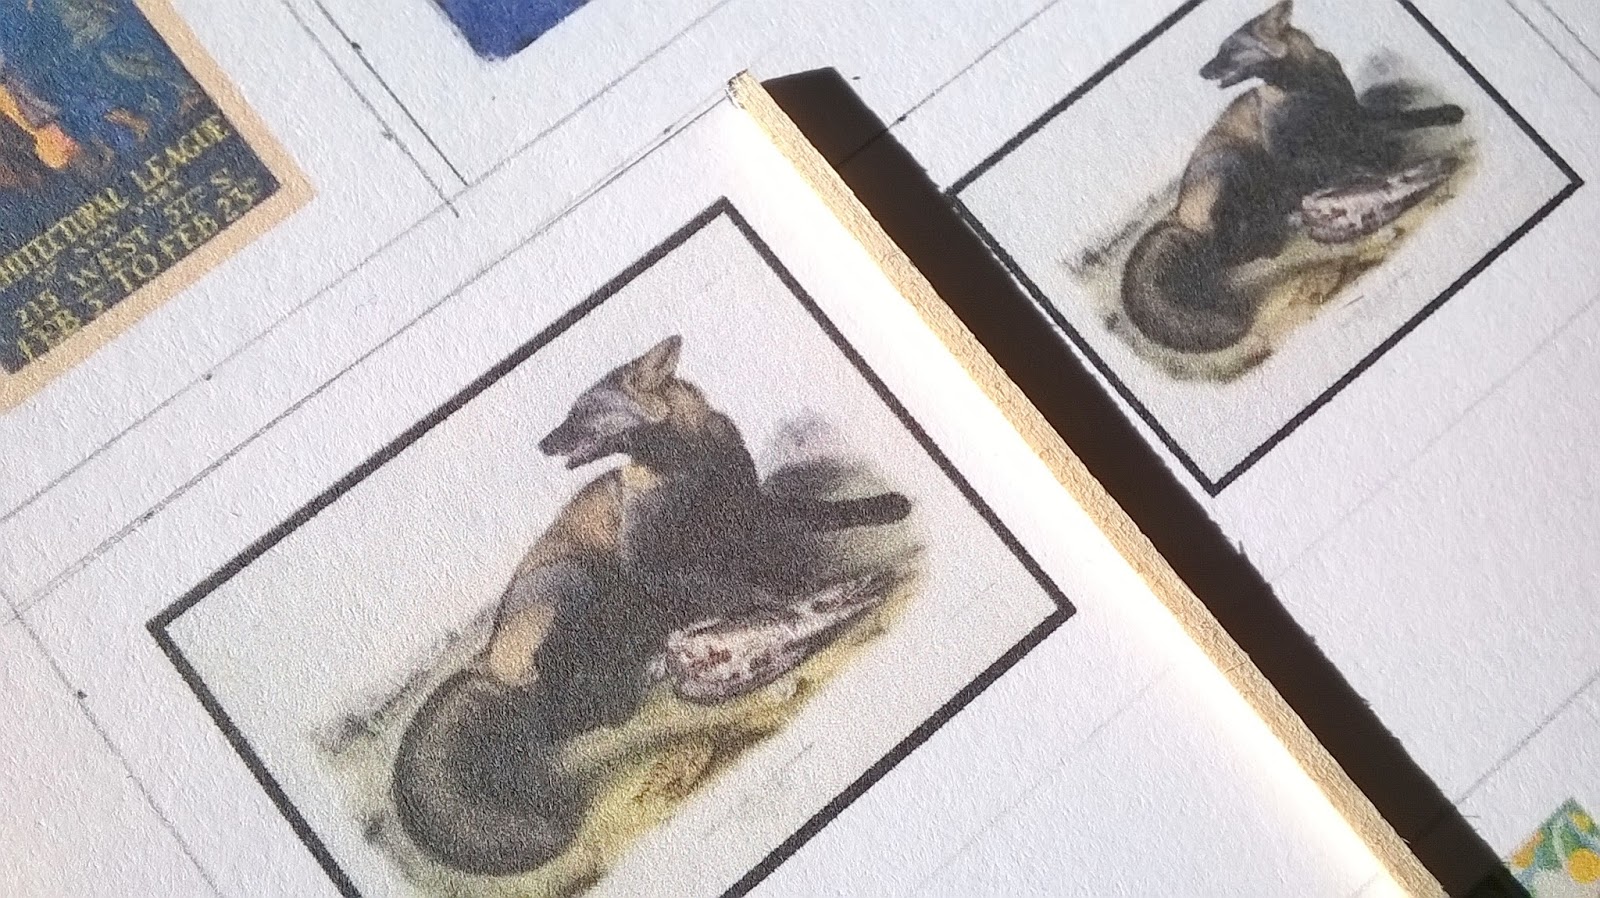
Create false matts by giving your artwork a boarder of space. I usually mark 1/8 of an inch around my artwork using a ruler, which looks nice with basswood that is 2/32 of an inch thick (shown).

Begin by cutting a 45% angle at the tip of your basswood.

Cut this strip to the edge of your print and add another 45% to the other end.

Keep repeating this process until you have all sides of the print framed.

I usually like to glue each side as I go along, and it only takes a very fine bead of glue to do the job. Any more will ooze onto your mat, or possible your artwork.

Ta-da! An easy, over-sized poster print! As a side note, if you are going to paint your frames, it is best to paint the strip of basswood first, then cut and glue to the artwork for the cleanest results.


Awesome post.
ReplyDelete